Photoshop Extended CS6 includes over a dozen new key features. I’ve chosen to feature a handful in this post, the ones that seemed to pop out the most for a photographer/designer.
Precision cropping with overlay guides and custom presets
In Photoshop Extended CS6, images can be changed nondestructively, quicker, and with greater precision by using multiple overlays.
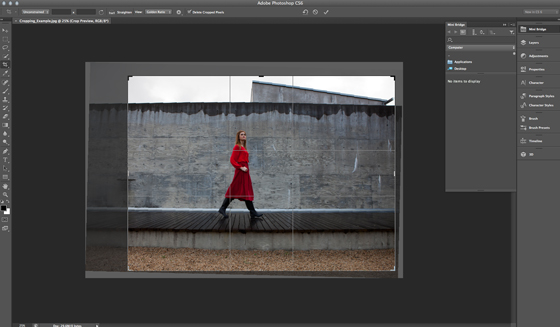
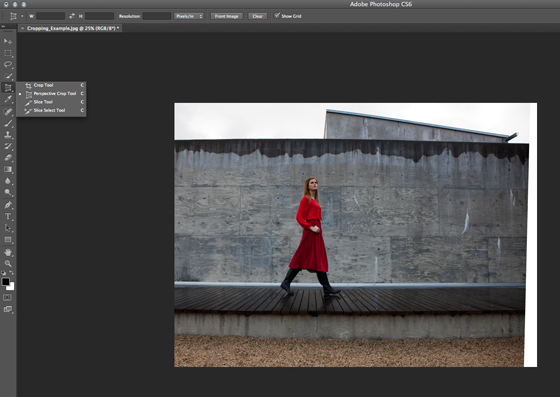
One of the key tools completely updated for Photoshop CS6 is the all-new nondestructive Crop tool. Change the format of your images faster and with greater precision with multiple overlays. The options include Golden Ratio, Golden Spiral, Diagonal, Triangle, Grid, and Rule of Thirds.
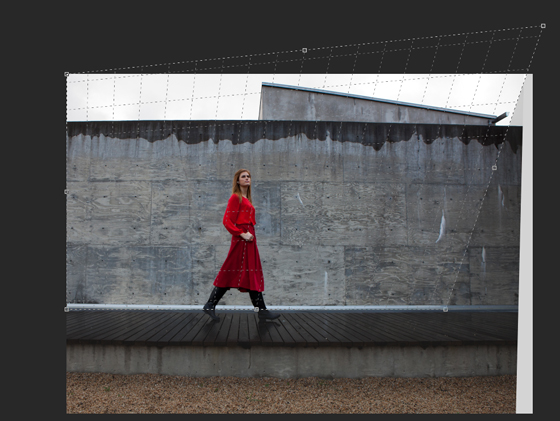
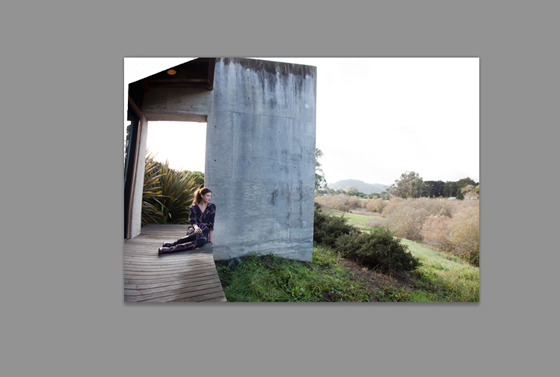
In the photo below, I’ve selected the Perspective Crop tool, with the grid in action according to the handle on the upper right that I dragged out.
The photo’s size and resolution can be saved as a crop preset for later use by selecting the newly-named entry in the presets menu.
Two New Content-Aware Tools
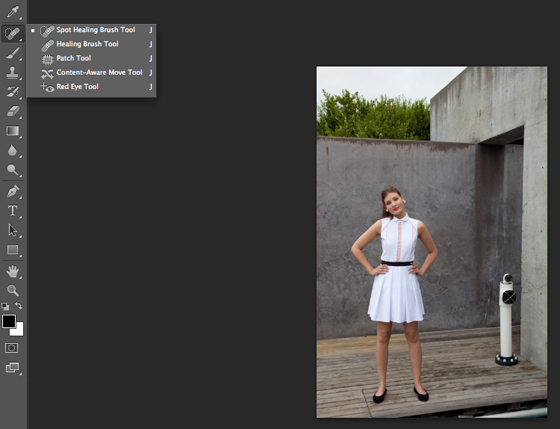
With CS6 comes two new features in the retouching tools: Content-Aware mode for the Patch tool and the Content-Aware Move tool. You can remove or move selected elements within your image, and then let Photoshop’s content-aware technology fill, patch, extend, or recompose an image.
I opened Mini Bridge within Photoshop CS6 to select an image.
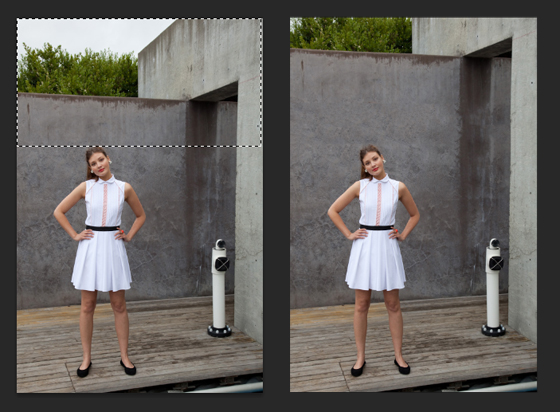
I then made a selection with the rectangular marquee tool, switched to the Content-Aware Move tool, set the Adaptation value to Medium in the tool option bar, and moved the selection.
The photo on the left shows the selection ready to be moved; the one on the right shows the sky filled in with the shrubs, once the Content-Aware Move tool has been used.
The content aware patch tool selection can move an object in an image to another area, or delete it, having it match the background via content-aware technology.
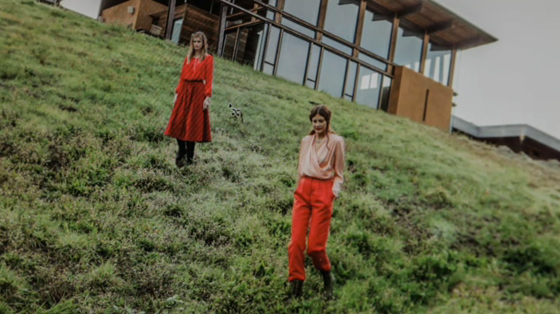
Here’s a before and after shot of a woman who’s been moved from the right area of the grass over to the left.
New Blur Gallery
The Blur Gallery will let you create three photographic blur effects using Photoshop’s new controls. Blur actions can also be viewed live with Adobe’s Mercury Graphics Engine, provided your computer has a newer model graphic card installed. The same filter will switch back to CPU mode for older systems without the supported card or driver.
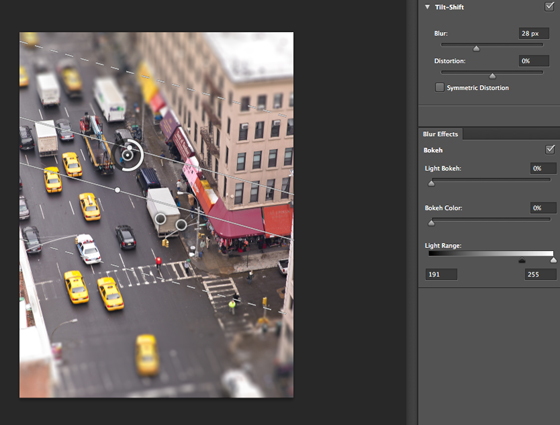
You can now align the sharpness along one or more planes with the Tilt-Shift option, or build a gradient blur effect using the Field Blur option and placing multiple pins with different sharpness settings. With the blur adjustments complete, style the overall effect with Bokeh brightness and color controls. With the options in the new Blur tools workspace, you can apply just one blur option or combine them all for an interesting effect.
One of the new effects is being able to recreate the look of depth of field effects with Iris Blur.
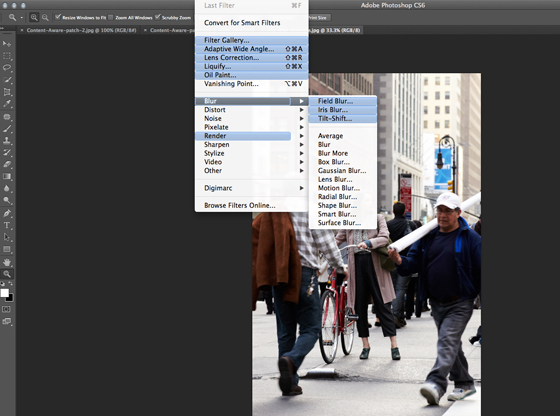
Notice the blue items in the menu. I’ve set my workspace to highlight the new features in CS6.
By default, the on-image controls are displayed with the central pin positioned in the middle of the photo. The pin sets the sharp point for the image, with the blur radiating outwards from this point.
Dragging the pin to a new location on the changes the position of the sharp point. You can add extra pins by clicking on other parts of the image, and remove unwanted ones by pressing the Delete key.
Control the transition between sharpness and blur by adjusting the relationship between the ellipse (the point of maximum blur) and the four inner dots (the area of sharpness). You can get more precise control by holding down Option (Mac OS) or Alt (Windows) key to move the inner dots independently. By dialing the Blur Ring clockwise, you’ll increase the blur; anti-clockwise will decrease it.
I also played around with the Tilt-Shift Blur, dragging the sold and dotted lines to increase the transition area between sharpness and blur, as well as rotating them to change the blur’s direction. This too can create some interesting effects.
New and re-engineered design tools
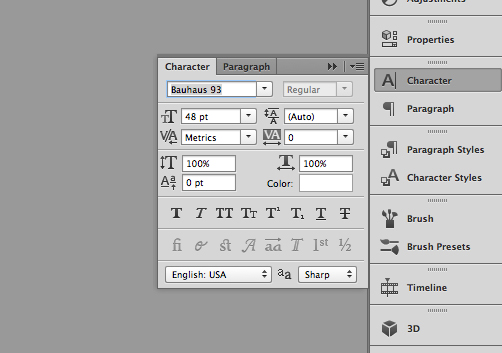
Photoshop’s new Paragraph Styles panel works with both paragraphs and pages of type, specifying typographic controls similar to those in other Adobe layout programs such as InDesign and Illustrator.
Also new is Vector Layers, used to create shapes, lines, and objects, and then apply custom strokes and fills to them. You can fill shapes with predefined gradients, colours, or patterns, and outline edges with custom strokes and dashed lines.
The new Snap To Pixel and Aligned Rendering options work to align vector objects to the pixel grid.
Adaptive Wide Angle adjustments
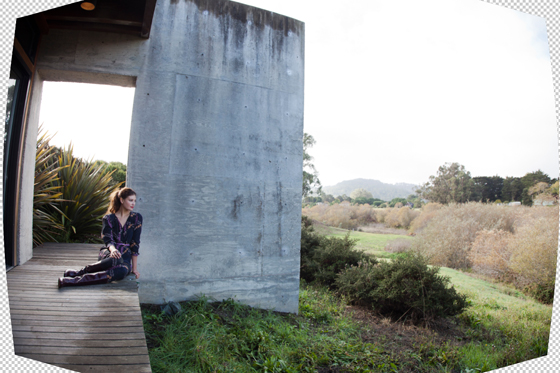
Use Photoshop’s new Adaptive Wide Angle adjustments to straighten objects that appear curved (photos shot with fisheye or wide-angle lenses, or panoramas created with Photomerge). This filter uses the same characteristics as a physical photo lens to automatically correct and straighten curved objects in an image. Fine-tune the adjustments further with new on-canvas tools that let you identify which key objects in the scene to straighten and align vertically or horizontally.
The Adaptive Wide Angle filter automatically sets the Correction mode to Auto for images captured with lenses that are included in the Lens Correction Profile database. For images with no associated profile, the Correction setting can be selected manually from among the following options:
Fisheye: For images photographed with an ultra-wide angle or fisheye lens that have several straight edges that appear curved (e.g. barrel distortion)
Perspective: For images where building edges are predominantly straight but not parallel (converging verticals or foreshortening)
Spherical: Used for panorama images covering an angle of view of 180 degrees by 360 degrees and saved in a 1:2 format
Panorama: To correct a panorama shot that’s been stitched using Photomerge in Photoshop CS6 (this mode currently replaces the Auto option with stitched source images)
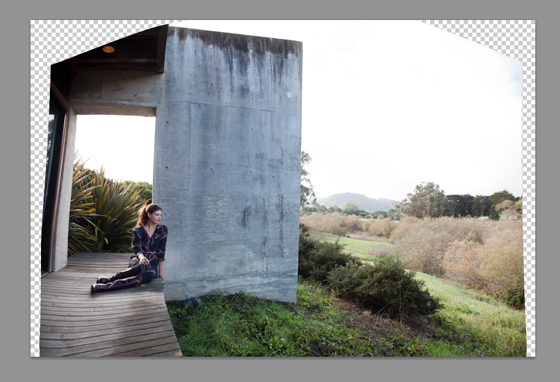
Once you locate and draw lines along the most curved portions of the photo, select OK to see the changes take place. Here’s a before and after image that I tested with Adaptive Wide Angle.
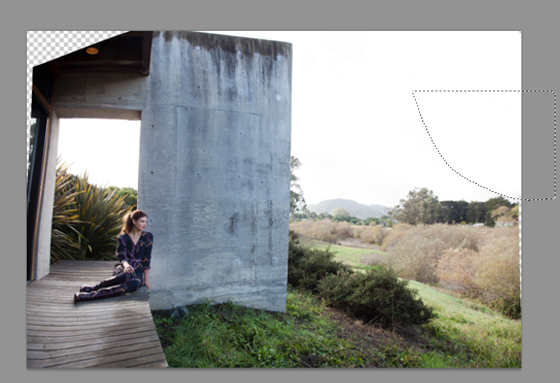
[Using Content Aware Move Tool]
At this point, you can use cropping as well as the content-aware tools to fill in transparent areas, which is what I did to get the result below.
Modern, darker interface
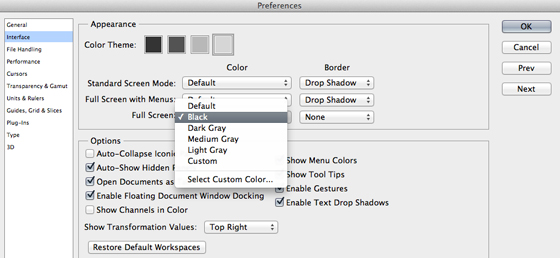
I like the new colour choice in backgrounds for this latest version of Photoshop. I started with the black background (default) and changed it to a darker grey for my work space. It’s also possible to change up the image border type and position of the on-canvas display (Transformation Values).
3D Features
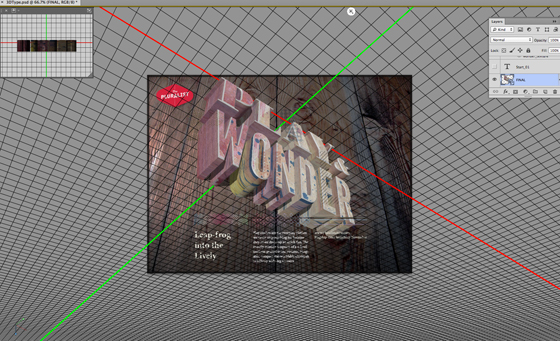
You can now create 3D artwork with a vastly simplified user interface, offering both on-canvas and in-context scene editing (3D features and some GPU-enabled features are not supported on Windows XP).
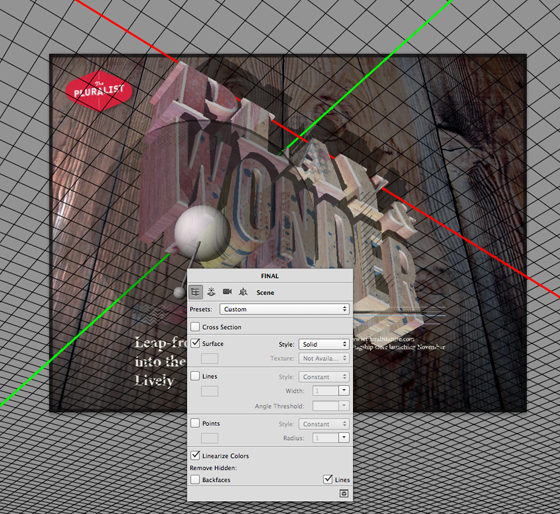
[3D with properties panel open]
I played around with a sample file to get an idea as to the possibilities. Even though Photoshop uses the fastest rendering mode it can when editing and interacting with 3D objects, RayTracer is recommended if you’re after high-quality rendering.
More Adobe Photoshop Extended CS6 features can be viewed here. I’ll also be featuring Adobe InDesign CS6 and Illustrator CS6 in upcoming posts. See my Creative Cloud and Adobe Acrobat Pro X features covered previously.
